
Hi Guys! I am super duper excited to finally be able to write this post! I had two major sewing goals this year: to sew an Archer button up and to make jeans. I am thrilled that I can say I’ve achieved both goals! Both seemed like such big projects that they took sewing dares to make me actually start the process. And I was pleasantly surprised with how much I loved sewing both of them. I can easily see how people get hooked on shirt making and jeans sewing. My sewing dare for the jeans was from Heather and I finished them the day before my deadline of the end of August.
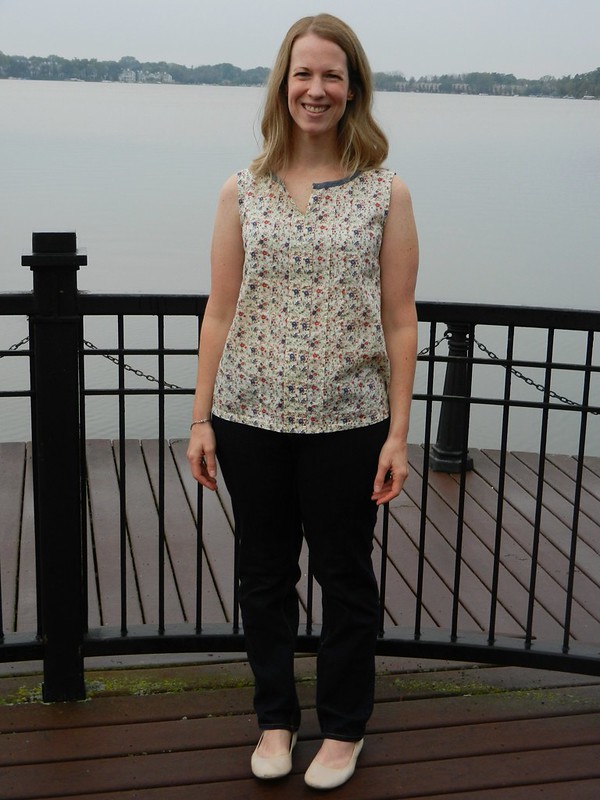
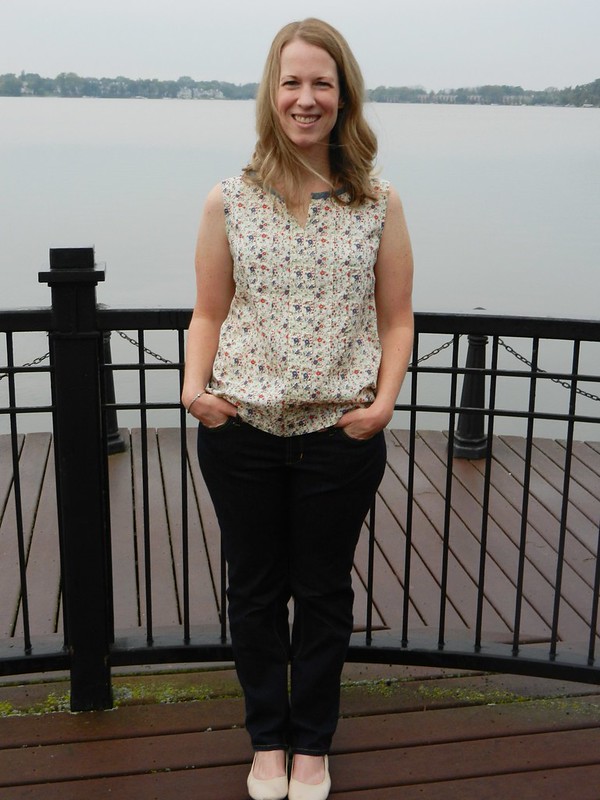
I went with View A of the Ginger Jeans pattern. This is the low rise, stovepipe leg version. I bought this pattern ages ago when Kollabora had a 20% off sale. I have some of the Cone Mills denim from the Ginger Jeans kits that Heather sold earlier in the year, but I didn’t want to use that for my very first attempt at jeans. This denim is from Girl Charlee and I bought it at the beginning of the year. I don’t think they have this exact denim right now, but they do have some other options that look good. I made a size 14 graded out to a 16 at the hips. The only change I made to the pattern before cutting was to add 1/2″ to the center back of the yoke and taper it to nothing at the side seams. I like my jeans to be higher in the back and dip down in the front. I wasn’t sure if that’s how the pattern was drafted but I figured I could always remove the 1/2″ if I didn’t like it. I also ended up having to cut the waistband with a center back seam since my denim was a little bit too narrow for the whole thing to fit.

I cut everything on the single layer as Heather recommends in her Ginger Jeans sew along. Once I had everything cut out I basted the jeans together for a fit check. Remarkably, I was mostly happy with the fit. I had a bit of looseness/bagginess at the crotch, which is fairly common for me. I posted a picture on Instagram and many wonderful sewing people came out with their recommendations of how to fix the issue. I straightened the crotch curve a little bit, which mostly solved the problem. I also had gaping at the back yoke/waist. I ended up solving that by taking a 2″ wedge (1″ on each side of the center back seam) from the waistband and tapered it down to nothing just above the end of the crotch curve.

Once I got to doing my actual sewing I really started having fun. I started out using just my regular sewing machine, but after a while I dragged out my auxiliary machine to I wouldn’t have keep switching from regular thread to top stitching thread. I was able to go a lot faster once I did that. (I know not everyone has stolen their mom’s sewing machine and therefore has access to two machines– these jeans are totally doable with just one!)

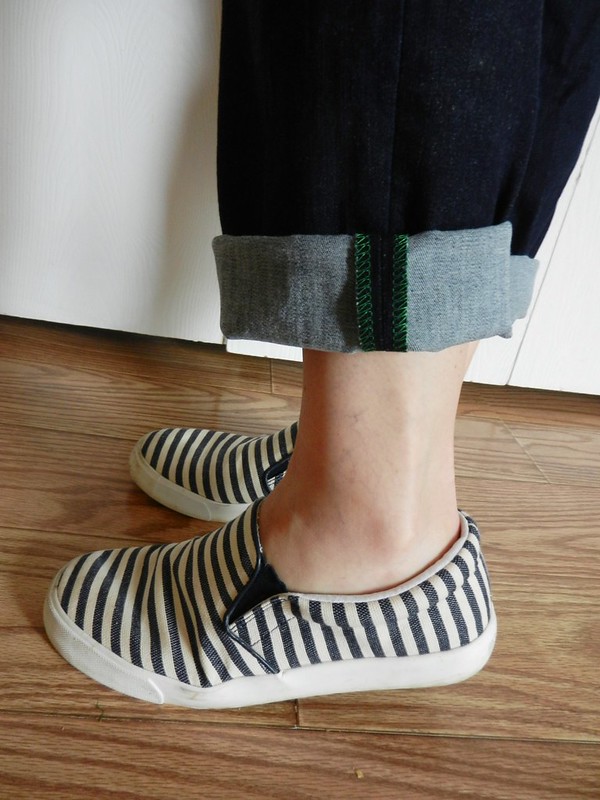
I went all out and flat felled the yoke seam and the inner leg seams. I used some leftover Cookie Book fabric for the pockets (because I wanted my jeans to match our bedding!) and decided to finish my non-flat felled seams with kelly green serger thread. I finished the outer leg seams separately (instead of serging both seam allowances together as one) which is how my ready to wear jeans are finished. I love the effect of the two rows of green stitching when the jeans are cuffed.
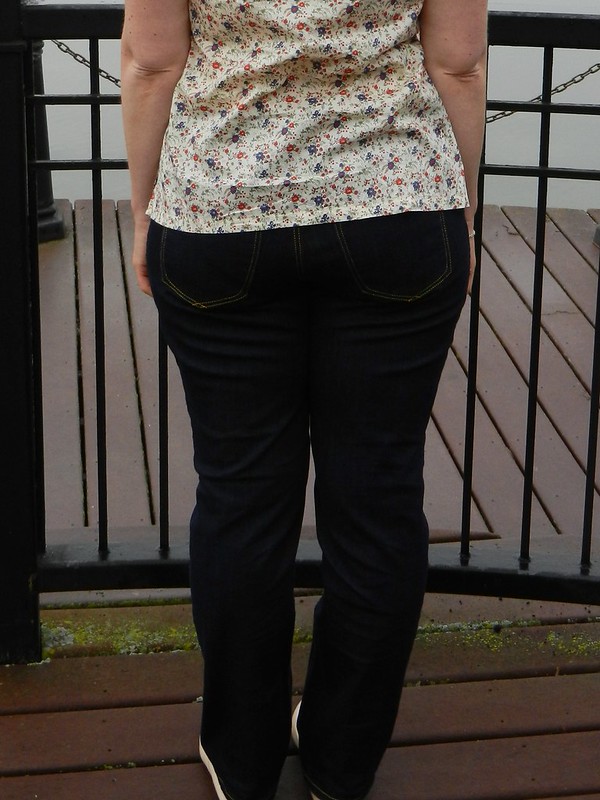
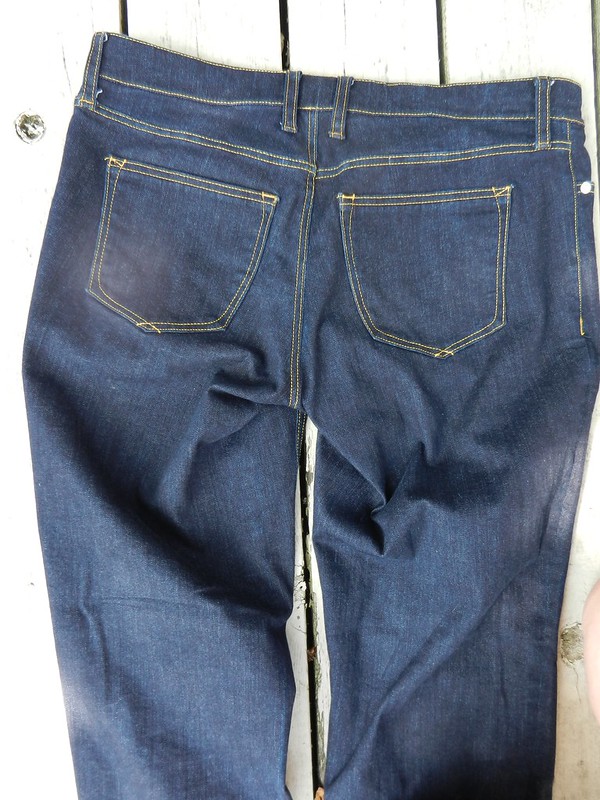
I am really pleased with the fit of these jeans. When I was working on my pocket placement I had my husband take a bunch of pictures of my backside. (Scrutinizing my bum was probably my least favorite part of this whole process!) I had him take pictures of my favorite Gap jeans and I was pretty horrified with the pocket placement on them. The pockets were set so wide that they make my generous backside look even wider than it already is. I don’t know that I’m ever going to look at my butt and say, “Wow!” But I think these jeans are a major improvement over the ones I’ve been wearing.

The only issue I had with sewing these was that because I had to cut the waistband in two pieces I had too much bulk in the center back to position the beltloop directly over the seam join. I wanted to cover it with a belt loop, but I could not get my machine to sew the bartack on the top of the loop. I decided to add a belt loop and put one on either side of the center back waistband seam. I was nervous about installing the button and the rivets, but it wasn’t too bad. The button did pop off these jeans right after my husband took these pictures, but I hammered it back on and I think it’s more secure now. I found the Ginger Jeans sew-along to be invaluable for sewing my first pair of jeans. I can’t imagine how much time Heather put into her detailed posts.

I haven’t really had a chance to wear these much since I made them because our temperatures have been in the 90s for the last week. I am excited for Fall weather to set it so I can wear these and see if there are any changes I want to make before I start my next pair. I want to try a skinny leg variation but with the low waist of this view so I may try that next.
Did anyone else set sewing goals for the year? How are you coming along on them?
~Teri
p.s. Based on Gillian’s challenge in her recent Better Pictures Project post, I decided to try a new location for my photos. After we did the pre-school drop off, my husband, Caroline, and I went to the lake and took these photos. The weather didn’t cooperate at all for us– it was so overcast, humid, and gloomy. My curls died a slow death and it’s sort of hard to see details on this dark denim. I want to try again at this location on a less gloomy day, but I was too excited to post about my jeans to wait and re-take these photos.

Well done, they look amazing! I’m kind of in awe of any one who makes jeans, all that topstitching would really stress me out. I think my goal this year is just to slow down a bit and spend a bit more time on the finishing, hopefully by the end of the year I might have slowed down enough to have the patience to tackle jeans! 😊
LikeLike
Thanks, Helen! I sort of expected that the topstitching was going to stress me out, but I think it was the part I enjoyed the most. I think you’d do an amazing job with these if you decide to give them a try!
LikeLike
Yay! These look so great! You are such an amazing seamstress. I am always impressed with your ability to customize patterns to fit you perfectly. Well done! As far as my goal… My goal is to find 1 hour per day to sew. It might be the 1 hour between the time the kids go to bed and the time I go to bed, but I will do it (hopefully)!
LikeLike
Oh, thanks so much, Tracy! It’s been quite a lot of trial and error figuring out how to adjust patterns to fit me well. I don’t love the process of making muslins but it’s really such a great way to ensure that the clothes I make are actually wearable! I have been trying to get up a little earlier to have time to sew in the morning, but so far it hasn’t really worked out. I may try the hour after the kids go to bed, too!
LikeLike
Congrats Teri! These jeans are fabulous!! I’m so glad you reached your two big sewing goals, and both pieces really came out beautifully. I just saw your post in my reader and was so excited to see that you finished these! I had no doubt that you would do a great job with the fitting and topstitching, and I love that you went all out and added the rivets and jeans button too. Wear these with pride!! 🙂
Oh, and I love the new photo location! I’ve been thinking about this too and will have to get my blog assistant (aka boyfriend) to help me out with this next time.
LikeLike
Thank you, Carolyn! It’s such a feeling of accomplishment to have finished a wearable pair of jeans! It was also pretty cool to have to go into my husband’s tool box to hammer in the rivets and the button. I really will wear them with pride!
There are some great places close to my house that I can use for alternate blog photos, but since I don’t have a tripod or a camera remote I have to rely on my blog assistant/husband to take the pictures. It’s a real challenge to find opportunities to get away from our house to take the photos when we wouldn’t have to drag all the kids with us, too. If you can imagine, they are not always very agreeable about waiting in the car while Mom and Dad hop out and try to take pictures quickly.
LikeLike
Jeans! Congrats, you’re so brave…I’m not brave☺️ and could never make jeans!
LikeLike
Thanks, Abigail! I bet you could do it if you put your mind to it! Like anything else you just have to take them one step at a time!
LikeLike
Teri, these are fabulous. I love the green serged seams inside and the fun pocket bags. They look totally ready to wear. The pocket placement is spot on. It’s amazing what a difference pocket placement makes. I’m totally inspired to try my own jeans now. (I’m @sordidsox on Instagram.)
LikeLike
Thanks, Dagny! (I totally knew who you were, by the way!) I agree that pocket placement makes such a difference. Most of my ready to wear jeans have pockets that are just too small and they don’t do my rear-end any favors. I hope you do try your own! I’ll be looking forward to seeing pictures on Instagram if you do!!
LikeLike
Hi, I’ve been reading you blog for a while and thiught I’d chime in. These jeans are great, you’ve done a fantastic job. I made my first pair of jeans earlier this year, It’s such a great feeling to have jeans that actually fit as they’re supposed to isn’t it.
LikeLike
Hi Jenny! Thanks for commenting! It really is a great feeling to have jeans that fit my body. I love that the rise is exactly the length I prefer. Did you make Ginger Jeans? I am sort of curious to try the Named Jamie jeans sometime, too.
LikeLike
No, I haven’t tried any if the named patterns yet, I just make it up as I go along. Sometimes they work out and somtimes they don’t. I’m only just stsrting to learn about the indie patterns, I only knew about the big 4 up till recently and I had given up on them, they’re just as bad as ready to wear in the way they fit my body. Soon I will try some if the indie patterns and see if they’re any better.
LikeLike
You are awesome and your jeans rock! I sewed my first Archer this year too; now I’m feeling braver about trying jeans.
LikeLike
Thanks, Amber! Did you like sewing the Archer? I am looking forward to making my next one but I’ve got a striped fabric so I’m going to have to be really careful with cutting. So far I haven’t felt like tackling that project, but I will soon. I hope you do try the jeans. The sewalong was really amazing and I know I’ll refer back to it next time.
LikeLike
I did enjoy sewing the Archer! I intentionally chose a solid fabric for my first so I could focus on the shirt details rather than pattern matching or keeping stripes straight 🙂
LikeLike
You are a superstar, Teri! Your jeans look fabulous!
LikeLike
Haha, thanks, Fiona! I’m going to try not to let this go to my head. I’m sure the next thing I have to unpick will bring me back to reality.
LikeLike
Teri they look amazing!! Well done! I love your topstitching – it looks fantastic and I love the little pocket details. The green thread also looks great! Isn’t it so awesome to be able to make your own jeans? I knew you could do it! I look forward to seeing what you think of the Cone Mills denim – it’s lovely!
LikeLike
Thanks, Heather! And thanks for the dare that got me off my rump and got me sewing these! I am a little scared of cutting into the Cone Mills denim– hopefully I won’t let it sit forever like I do with my Liberty of London fabric. 🙂
LikeLike
Don’t! You are amazing and can sew with anything, and that’s what that fabric is for – for making and wearing!
LikeLike
These turned out great!! I’m glad you ended up enjoying the process, it really is fun to watch them come together. Lucky you having a secondary machine for top stitching! I was hoping to pick up a cheap find on craigslist but my sewing money keeps going toward patterns and fabric instead… funny how that works! Anyway, fabulous job!
LikeLike
Thanks, Lisa! From the moment I did the topstitching on the pockets I was hooked! My sewing money goes to the same things– I borrowed my mom’s machine (which is actually my old machine) the last time I got my machine serviced. And then I just never gave it back. Oops!
LikeLike
These look fantastic, Teri! I always feel so accomplished whenever I finish a pair of jeans (or an Archer for that matter too :D). Your topstitching looks so good for your first pair of jeans! I love the green serger thread too – so fun to have pretty insides!
LikeLike
Thanks, Katie! I really had a good time doing the topstitching– I am so happy that it turned out as well as it did! I think I want to try red serger thread on the next pair. Customizing everything is so much fun!
LikeLike
They look great! I’m really impressed with them. The green serger thread is a nice touch.
LikeLike
Thanks, Masha! I thought the green thread was fun. I might try red on the next pair for another fun contrast.
LikeLike
Your topstitching looks amazing! The jeans look amazing!
LikeLike
Thank you so much! I really liked doing the topstitching and it came out much better than I expected!
LikeLike
Incredibly impressive. And they fit even better than RTW ones? Now that is a real success, great job!
LikeLike